**Short answer how to finish a beaded bracelet without a clasp:** One way to complete a beaded bracelet without using a clasp is by tying the ends of the string into knots. Another method includes attaching both ends with crimp beads or wire guardians.
No Clasp, No Problem: How to Finish Your Beaded Bracelet Seamlessly
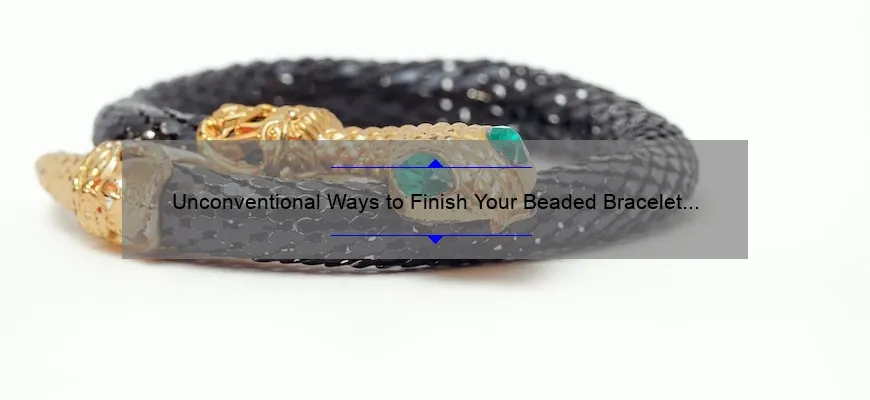
Beaded bracelets are beautiful and versatile pieces of jewelry that can perfectly complement any outfit. However, when it comes to finishing a beaded bracelet, many people struggle with finding the right clasp or closure that not only looks good but also stays securely on the wrist. Some may even avoid making beaded bracelets altogether because they cannot seem to find the perfect clasp.
But fear not! There is another way to finish your beaded bracelet without having to fuss over clasps – seamless closures.
A seamless closure for a beaded bracelet involves creating an instant knot or loop by using either crimp beads or knots made from thread/cord. This technique ensures that there are no metal hardware components visible on the finished piece, giving it a more organic look and feel.
The first method involves using crimps beads as both ends of the cord holding your beads together. Simply slide 2-3 crimp beads onto one end of your cord before adding beads, ensuring you leave enough space at the end (approximately 2cm) so that you have room for tying knots later. After stringing all your desired beads onto this same cord, take both cords and pass them back through each of those crimp bead ‘stops’.
Next step is holding these two ends near each other- then use flat nosed pliers (or regular household pliers-if you do not have jewellery-making tools), gently squeeze each individual clamp keeping tension between strands until secure like clipping nails lightly one after another leaving little gap in-between; lastly trim the access with wire cutters
Voila! You now have successfully created a seamless finish to your brand new beaded bracelet!
Alternatively, if you prefer working with thread or cord instead of metal findings, try creating tiny decorative loops along each end of your spiral rope patterns(or create any design which has extra length compared to wrist size) – just large enough for slipped knot mechanisms – weaving into “stopper” knots that won’t unravel once you pull the final two ends taut together
To create a seamless tie tangled your threads/cord, knotting one half tightly and snipping access off. Here’s the tricky part – Without undoing these now knotted cords; use it as a base for tying loops with each strand- add small decorative beads in between if desired -, pulling tight to form an almost “Chinese finger trap” like stopper on each end.
Congratulations! You have now successfully created another charming style of finishing bracelet seamlessly!
Seamless closures can be especially useful for those who may have metal allergies or sensitivities, as well as those who simply prefer the look of a more natural or bohemian piece.
So next time you’re struggling to find just the right clasp for your beaded bracelet project, remember – there’s no clasp required with this simple yet elegant solution that is seamless closure.
Frequently Asked Questions on Finishing Beaded Bracelets Without Clasps
As a jewelry designer, one of the most common questions I get asked is about finishing beaded bracelets without clasps. Many people struggle with finding the right way to end their beaded creations and worry that they will never be able to wear them comfortably or securely. Fortunately, there are several techniques you can try out!
Q: How do I finish my bracelet without using a clasp?
A: One option is to use an adjustable knotting technique such as sliding knots or macrame. This allows for easy adjustment and comfortable wearing, making it perfect for stretchy bracelets.
Q: Can I simply tie a knot to close the bracelet?
A: Yes! Simply tie a knot at the end of your beads after they’re strung onto your elastic cord—just make sure not to leave any excess string hanging out so it doesn’t unravel over time.
Q: Do these methods work on all kinds of bracelets?
A:Adjustable knotting techniques like sliding knots works well on stretchy cords while tying simple knots work best on non-stretching cords.
Q: Is there anything else I could use besides elastic cord or wire?
A:Yes! You can use leather laces or cotton threads instead.
Q: Won’t these unclasp options come loose easily if caught in something?
A:Whilst many alternatives don’t feature locking mechanisms like clasps however when set up properly they present little risk coming undone unnecessarily.
In conclusion,
Finishing beaded bracelets without clasps does not have to be intimidating or difficult task because as long as you are creative and mindful then you now know various ways to go about creating fastening functions that secure your lovely designs together beautifully 。
Top 5 Facts You Need to Know for Finishing Beaded Bracelets Without Clasps
Beaded bracelets are a timeless classic. They add an element of glamour and beauty to your attire and can be paired with any outfit. However, sometimes you may come across some gorgeous beads that just won’t fit into traditional clasps, or perhaps you simply crave something a little different. Whatever the case may be, learning how to finish beaded bracelets without clasps is definitely a skill worth acquiring.
Here are the top 5 facts you need to know for finishing beaded bracelets without clasps:
1) Use Stretchy Cord: The easiest way to create an elastic bracelet is with stretchy cord- it will give the bracelet a seamless look when finished, almost like magic! When using this type of cord, make sure not to cut too much excess off – always leave enough room so that the elastic stretches through each bead as they slide on. You’ll find yourself feeling confident in knowing that your beads aren’t going anywhere after completion!
2) Knot Your Thread: Another alternative method is knotting thread cords. This technique involves sewing individual strands of nylon or silk threads through beads individually then tying knots between them – creating secure points where all measurements meet up properly by neatly tucked tie-off locations every inch or two along its length keeps both ends together consistently.
3) Adding Crimp Beads: If your desired design has loop closures metal crimps are used to pinch onto pliant cording under tension until closure-loop-forms tightly at opposite end; thus holding other components closely unified throughout wear-time whilst adding texture or dimensionality as needed aesthetically upon visual examinations.
4) Making Loops With Wire Wrapping Technique : First up let’s discuss wire wrapping which uses jewelry-making wire (20 gauge wire being optimal).
Basically wrap one end around itself once pulled taught against fine chain links before bending remaining portion upwards beneath circular-nose pliers’ tips while simultaneously shaping dangling pendant loops already built-in underneath works perfectly well.
5) Using a Button: Lastly, you can use a button to keep your bracelet closed – but rather than attaching it with thread or wire, how about turning the button into an integral element of the design, aligning any loops that would clamp over or around it creating the desired finishing touch? This creates a fun and innovative look!
In conclusion, learning these skills will enable you to create unique bead bracelets without limiting yourself by size constraints- opening opportunities that perhaps otherwise would have been missed! Remember Practice makes perfect. Have fun experimenting!


